How to draw a lion
Welcome to our guide on how to draw a king of beasts. The King of the jungle, the lion is one, if not the largest, strongest and most powerful felines in the earth. These majestic creatures have earned their condition as rulers of the lands in which they inhabit.
In order to convincingly capture these astonishing big cats when learning how to describe a lion, information technology'southward vital to pay shut attention to cat'south proportions, muscular definition and facial structure.
- The best pencils: colouring, drawing and sketching
This step-by-stride tutorial volition guide yous through how to draw a side view of a male person African Panthera leo, starting with the skeletal structure, then sketching in form, and finally adding details to create an authentic representation of a panthera leo. The tutorial will also impact the best way to depict a lion roaring. You tin can follow the video above and the steps below.
Note: it is highly recommended that yous have a photo reference of a lion by your side when post-obit this tutorial to discover subtle angles and details that can be easily missed.
Once yous nailed learning how to draw a lion, be sure to check out our brilliant selection of other how to draw tutorials.
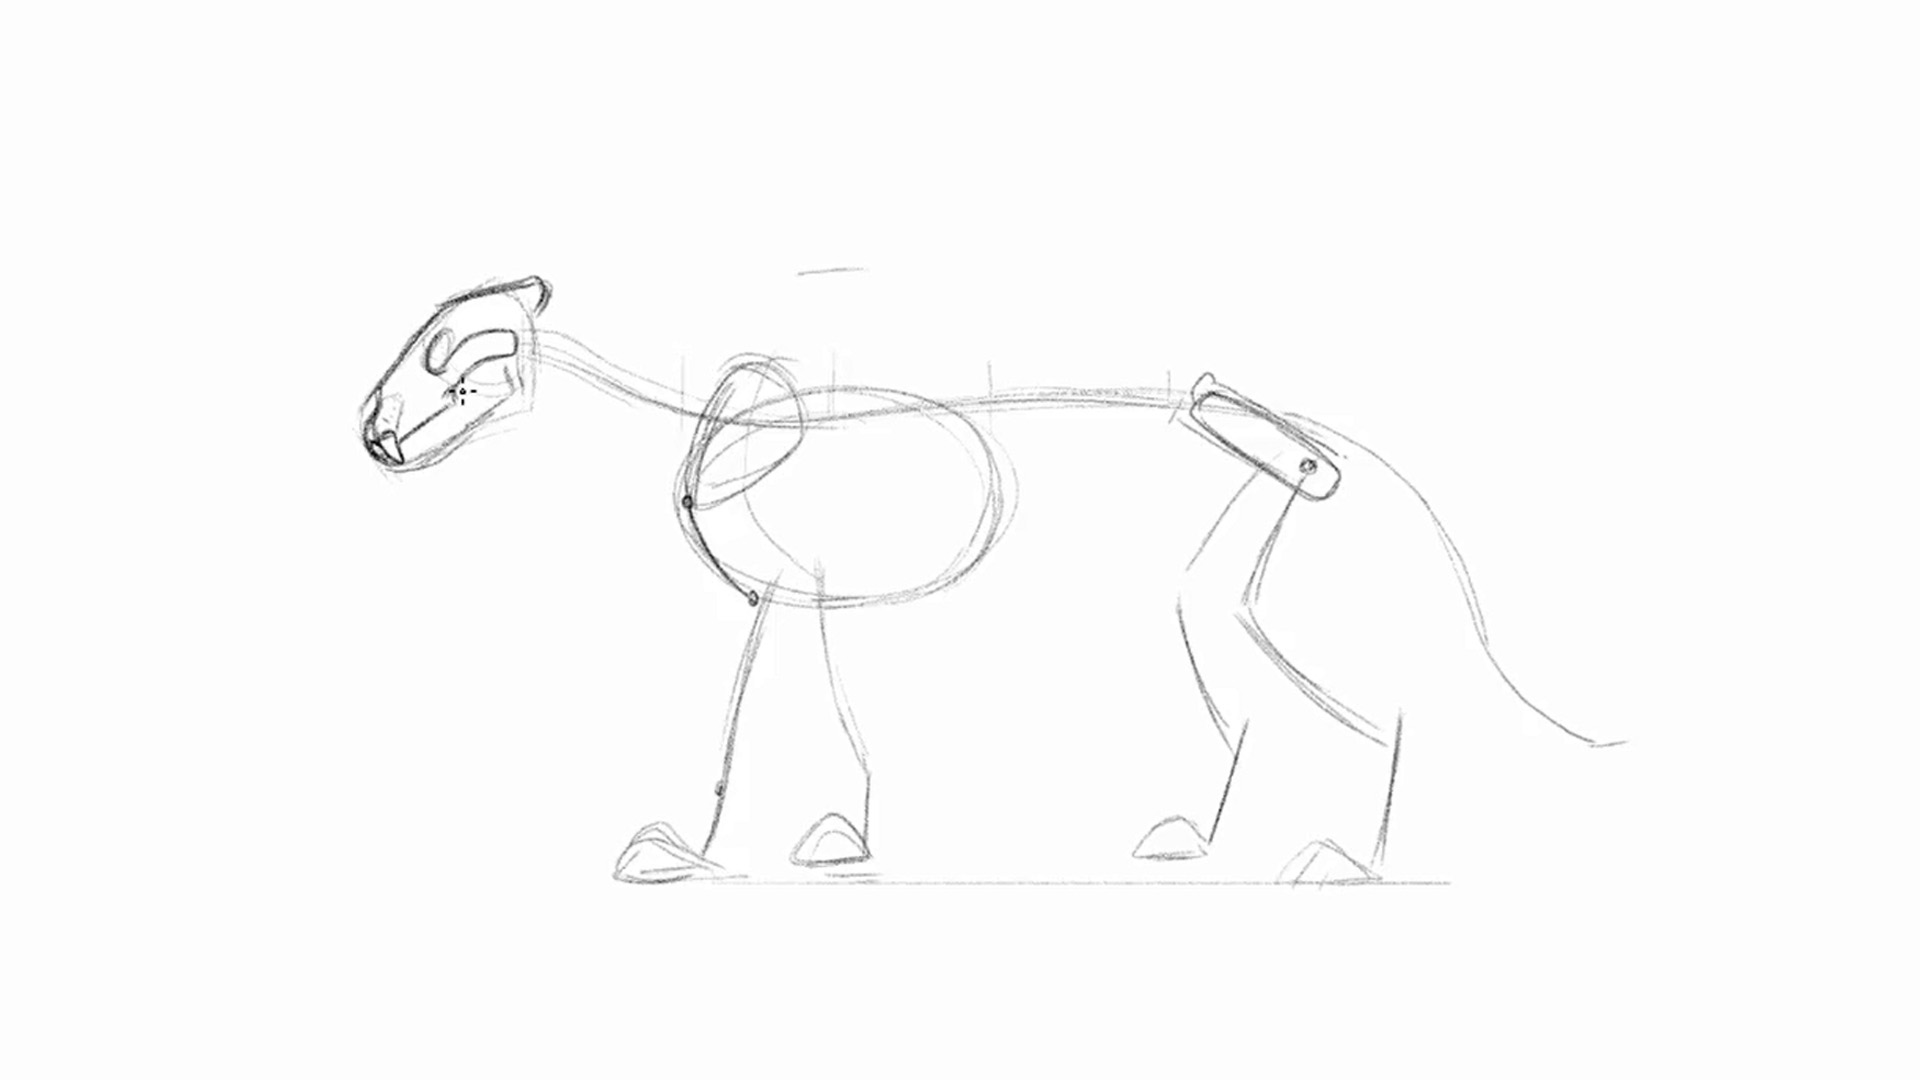
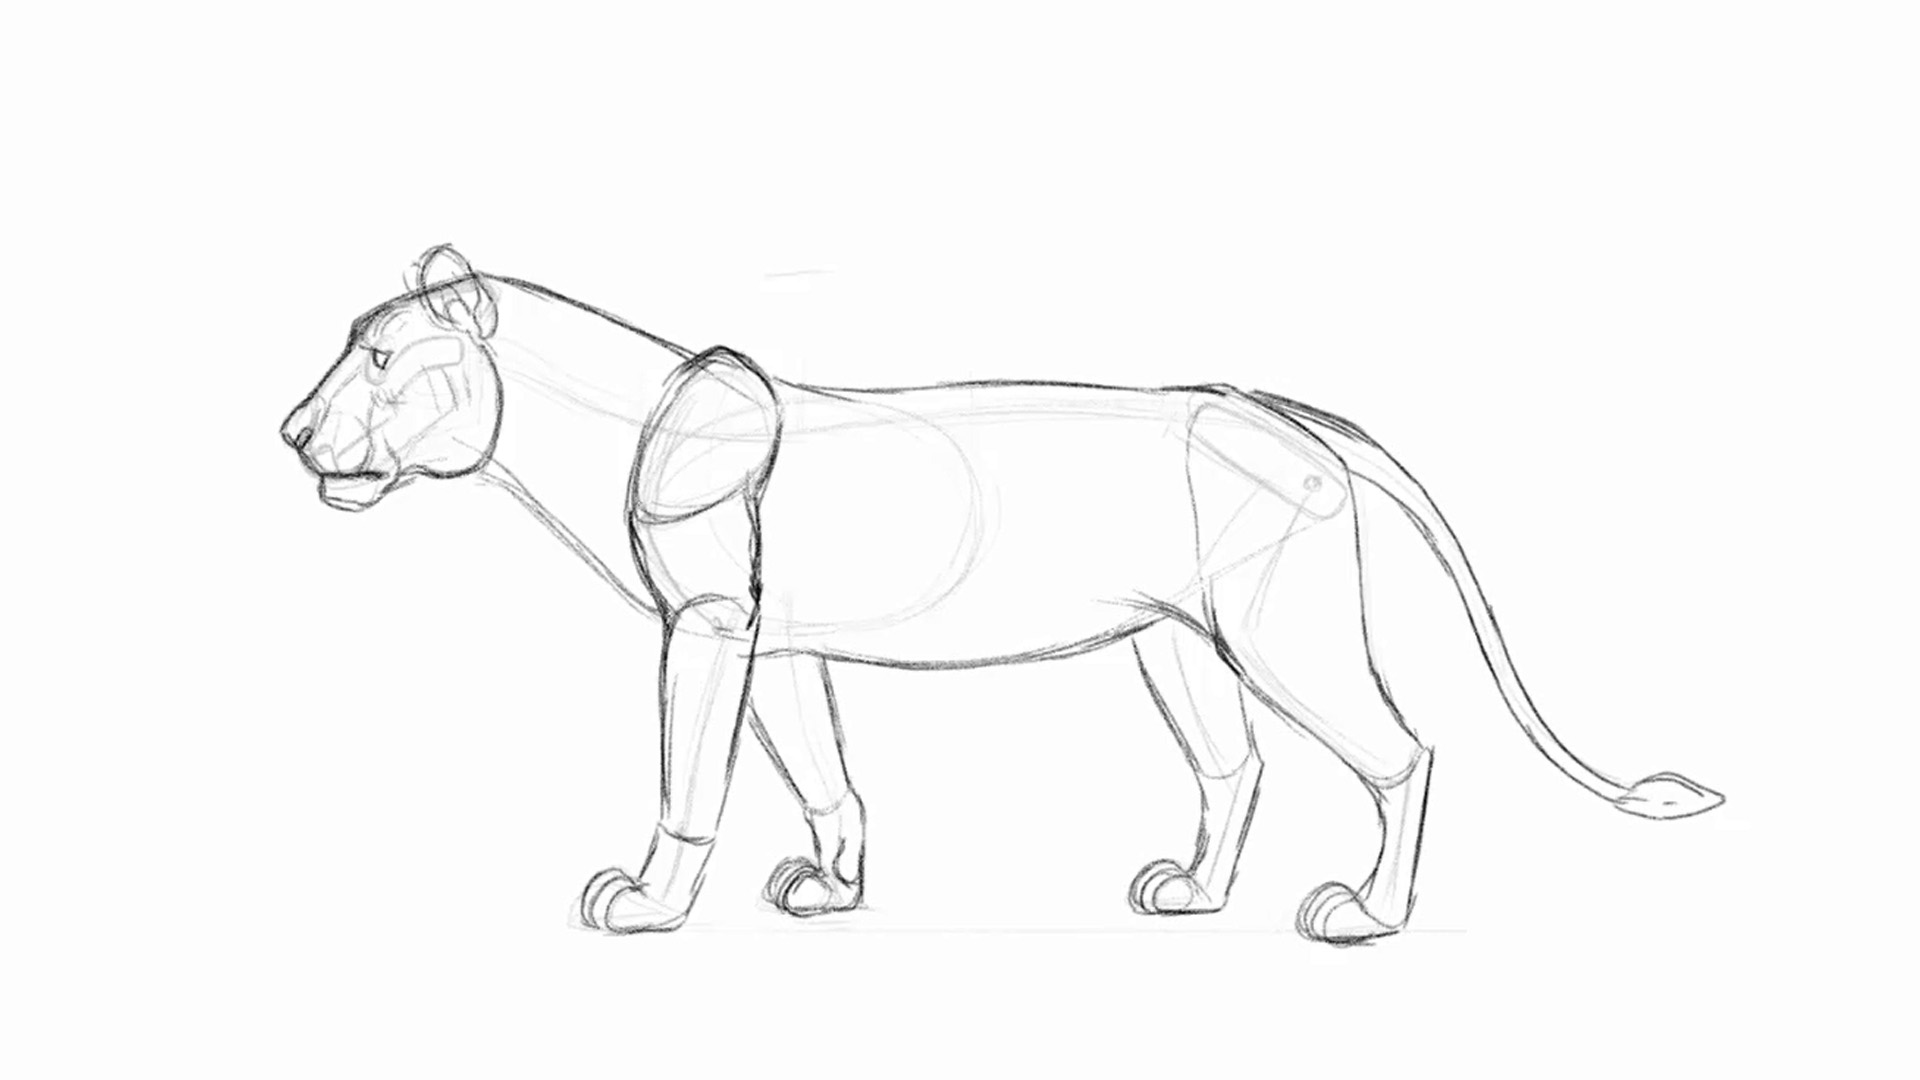
01. Draw in the caput and trunk
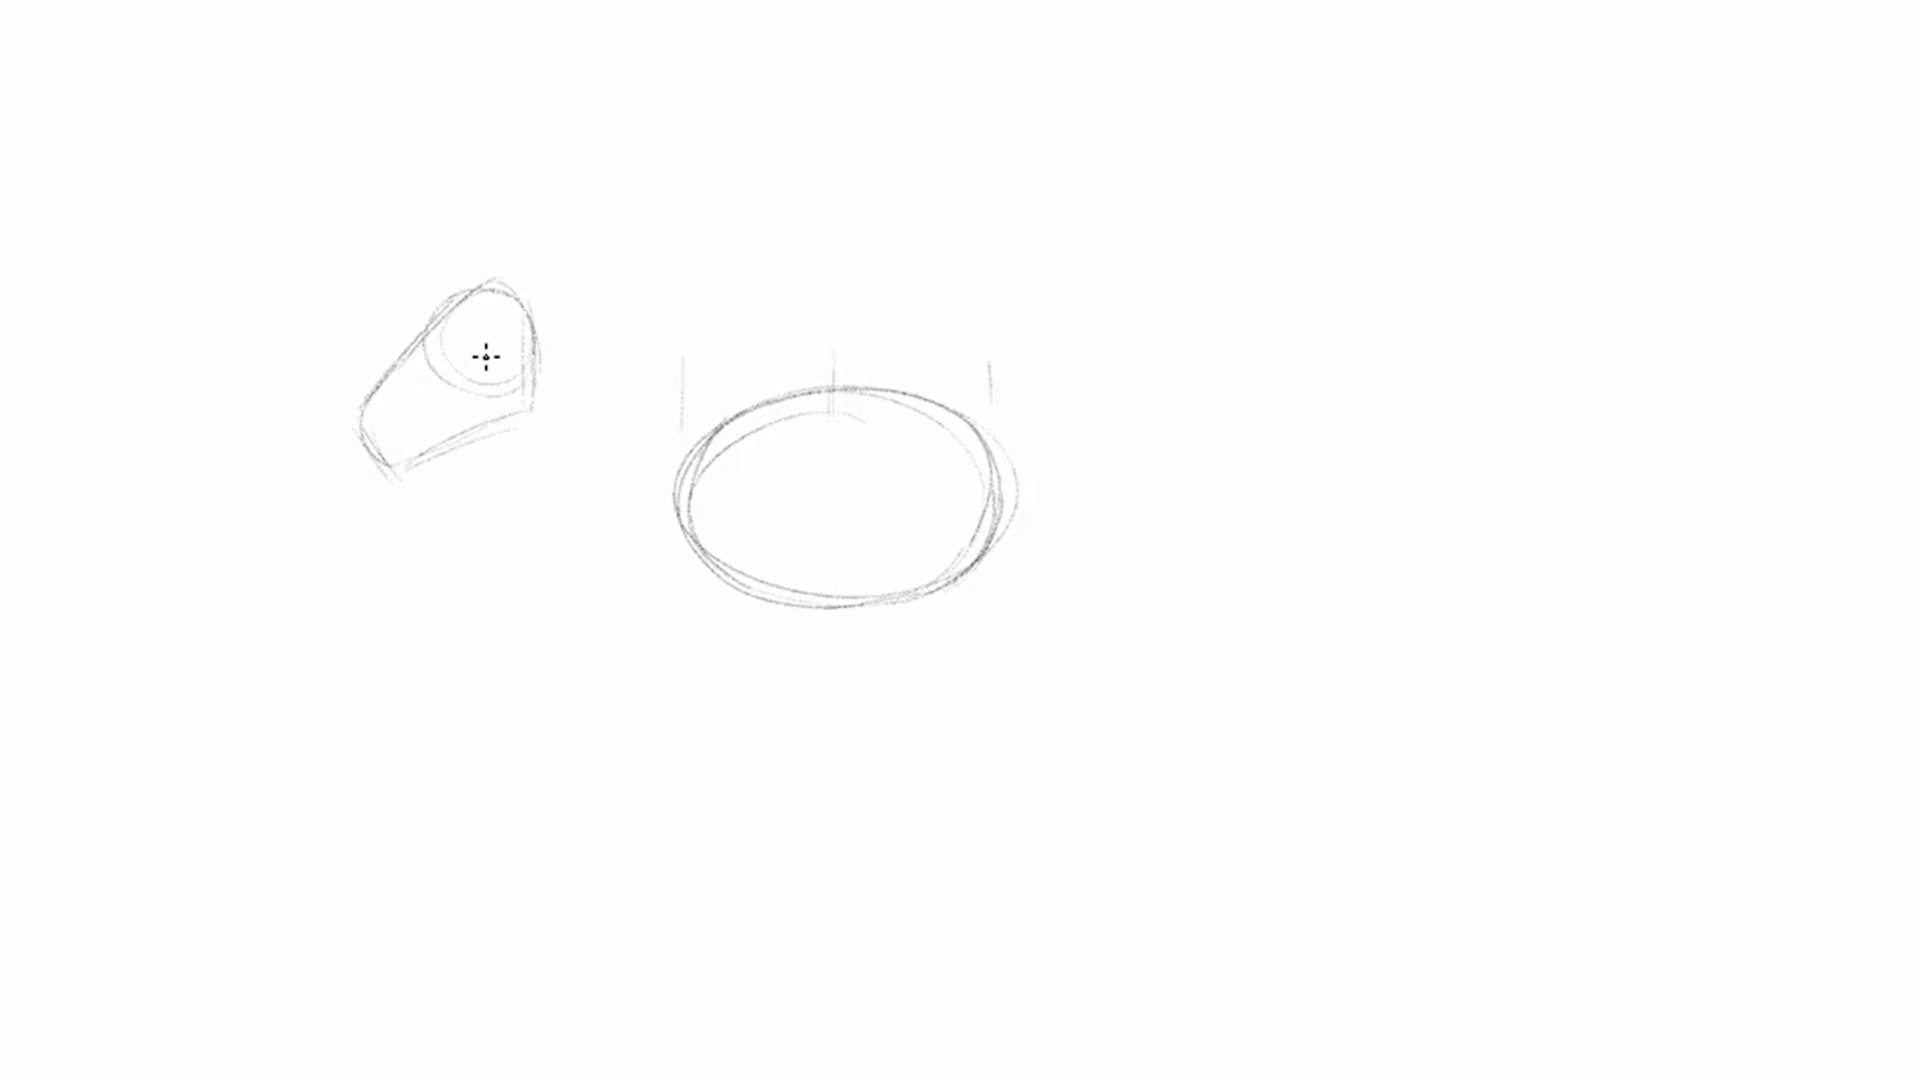
Describe a big oval for the rib cage, and etch in modest marks to divide it in half. Use a circle as the caput placed to the left, about half the size of the oval over but not higher than the top of the ribcage. Depict in a thimble-like shape angled down to capture the muzzle.
02. Connect the spine and body
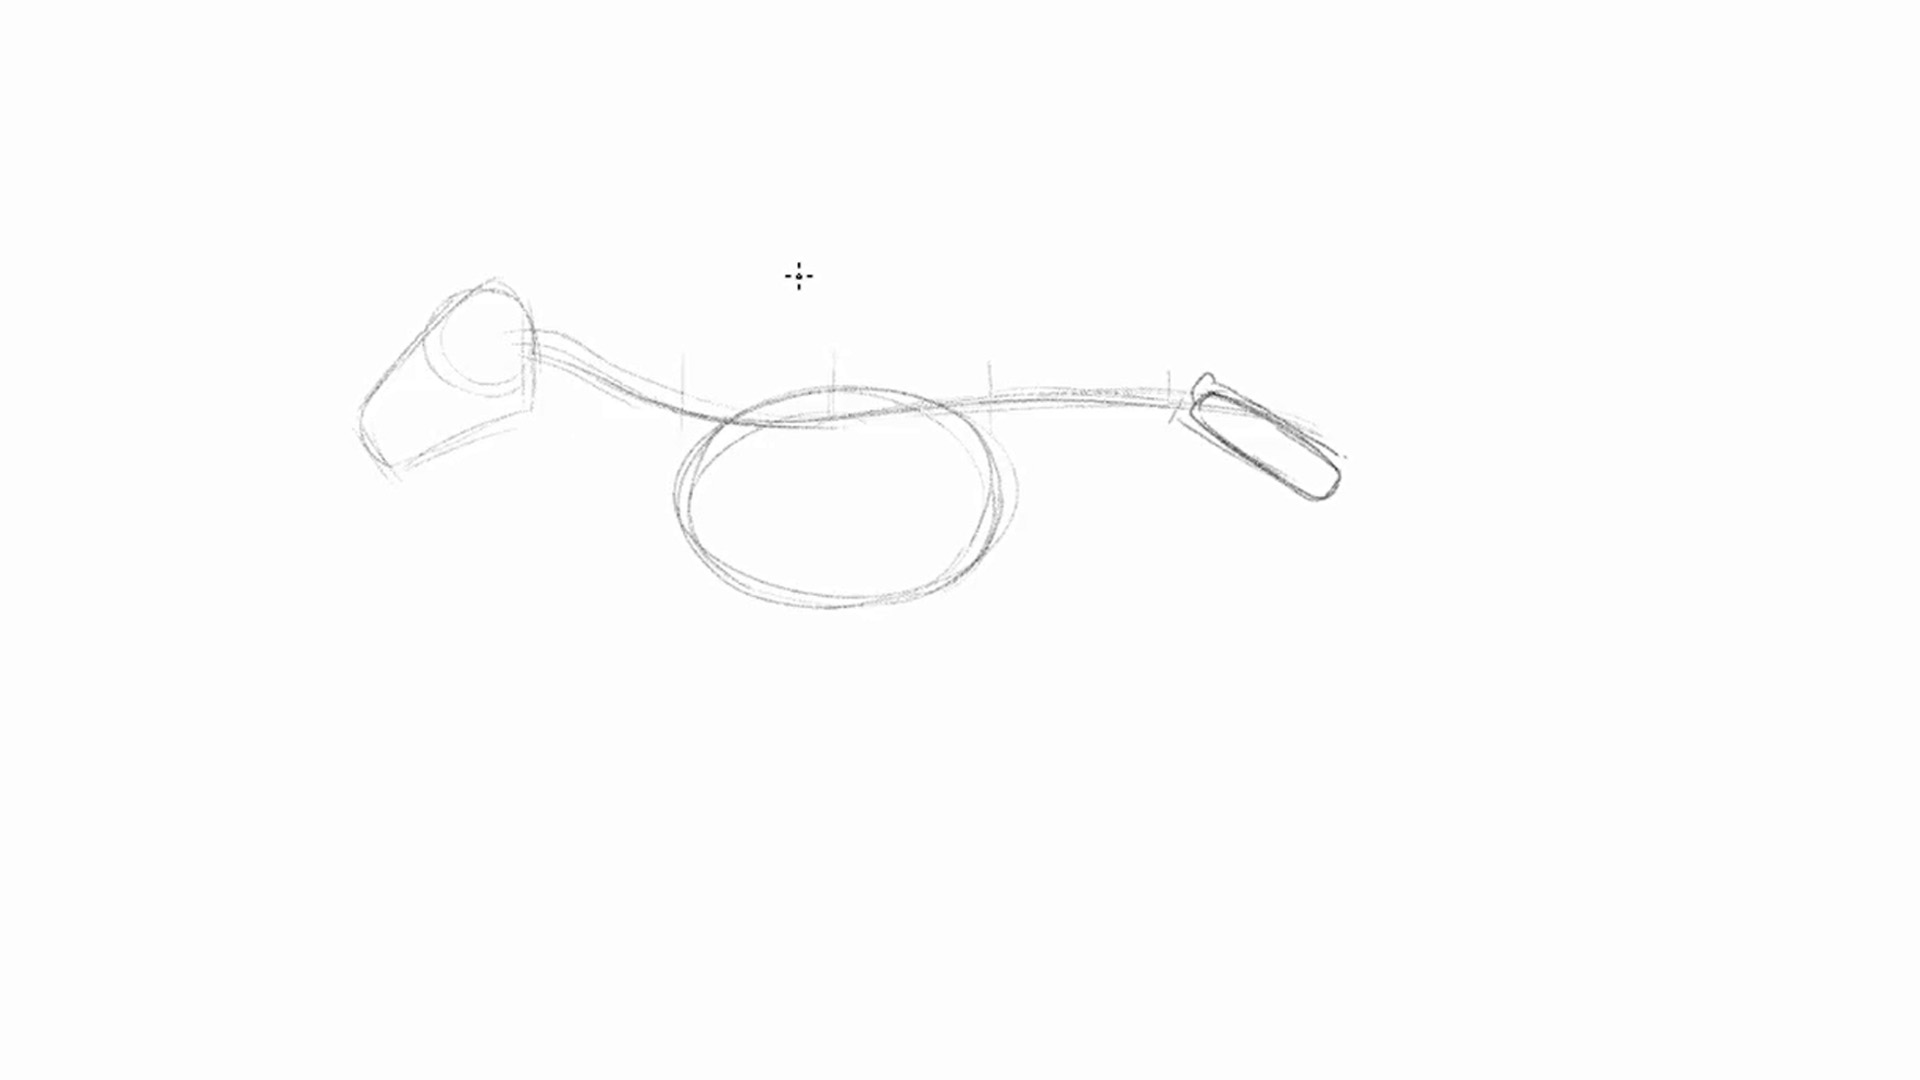
From the center of the head, connect the cervix to the body with an 'South' bend cutting through the ribcage to the back of the body. Make sure the arch in the dorsum is not too rounded. Accept the measurements of half of the oval and describe in the hips to the correct of the ribcage as a skinny rectangle tilting forwards.
03. Adhere the front end legs
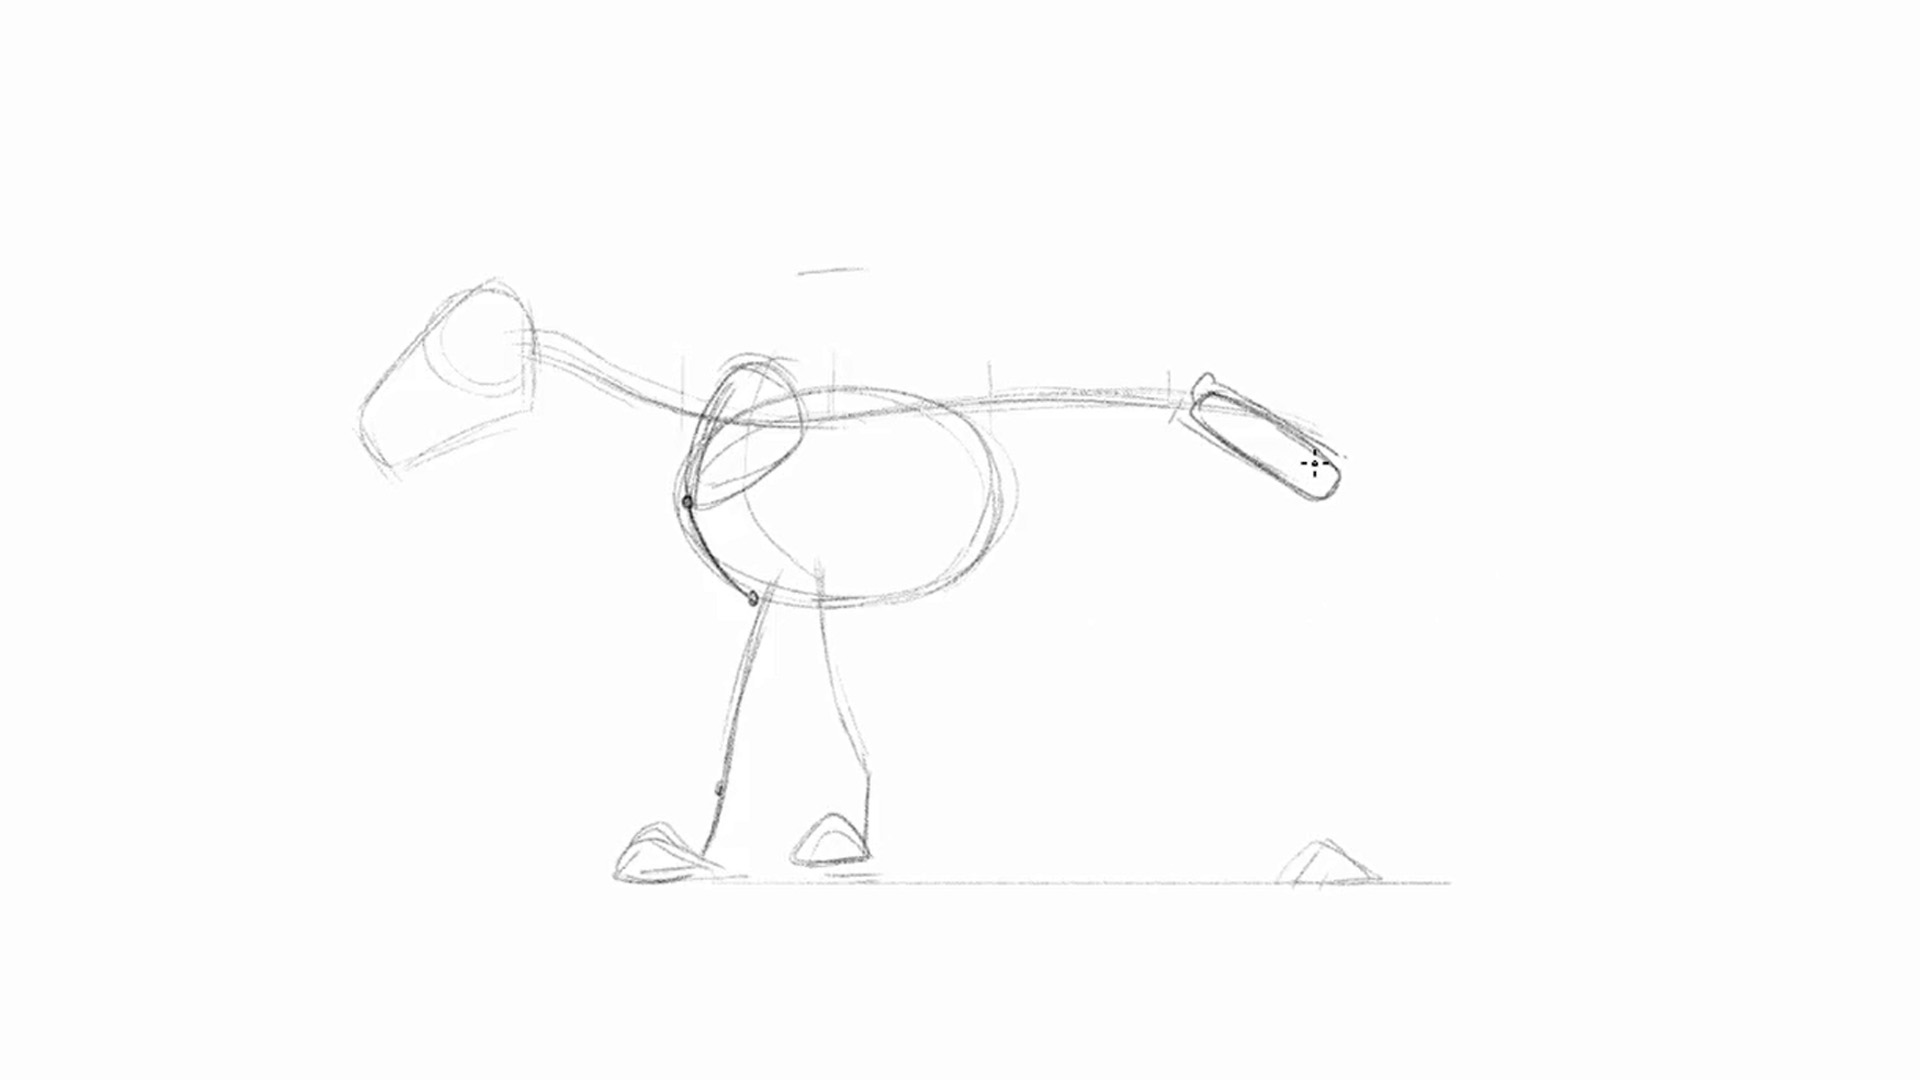
The lion is ii times the peak of the body and head combined. Draw small triangles as paws in front of the ribcage and behind the back of the hip bone. The scapulas are large seed like shapes that stick upwardly college than the spine in the standing pose. From the spine connect the arm back to the elbow, merely no lower than the ribcage. Draw the balance of the leg dropping downward to its paw, giving it a very subtle 'South' curve.
04. Attach the hind legs and tail
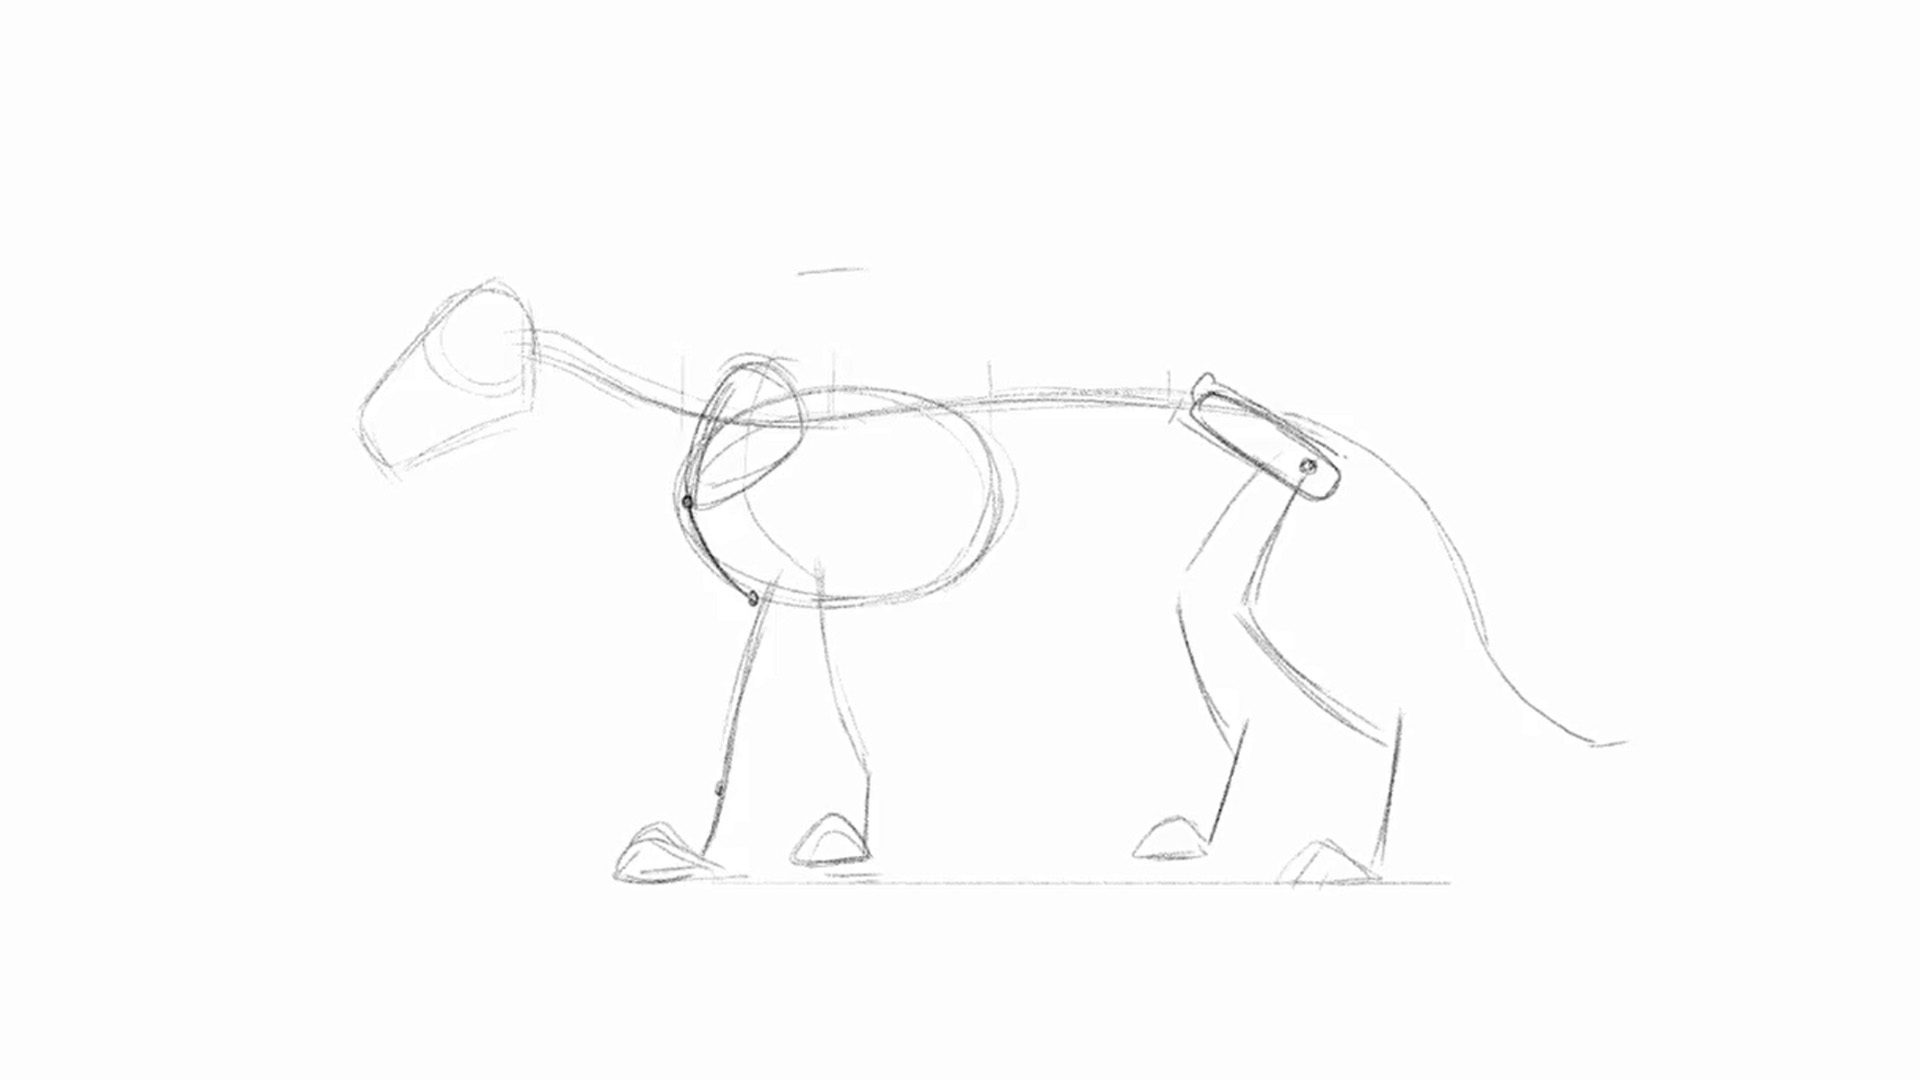
At the lower half of the hip, draw the leg coming forward down to the knees no further than the hips. The legs should come all the style back past the hips, followed by the foot straight downwardly. The long curled tail droops down to the ankles.
05. Carve out a simplified version of the skull
Flatten out the peak of the head where the circumvolve and line meets. Merely below is where the eye socket sits. At the back of the skull, a small function should be sticking out, whereas the forepart has a groove carved out for the big nose. Follow the outline of the jaw as it cuts upward into the cheek bone, which sits directly beneath the eye socket. Draw in the massive teeth in the forepart of the skull.
06. Mass out the head and neck
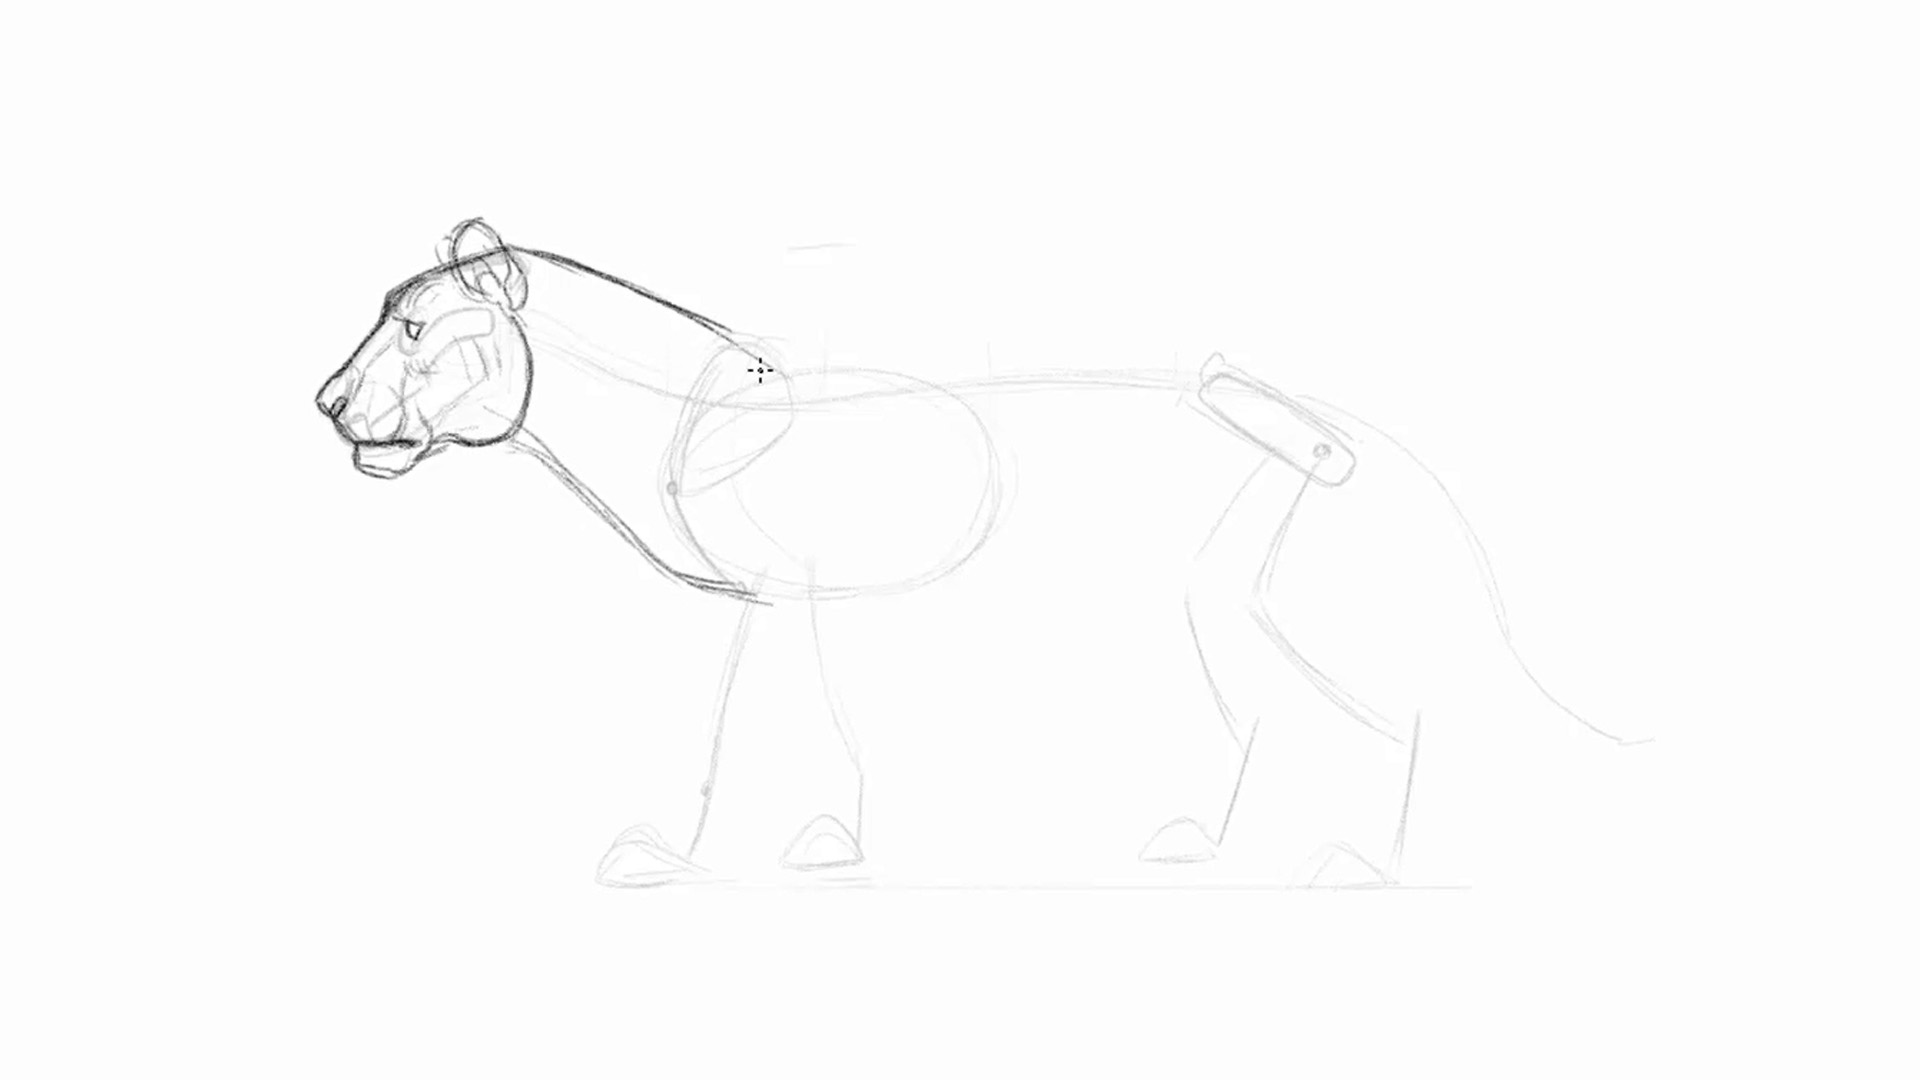
The lion's neck contains a lot of muscles, so depict a curved line to give it some volume. Place large eyebrows sitting correct above the eye to give information technology that hooded expect, and draw the eye equally a simple pie shape. The nose should look circular and full. Exercise the same with the oral fissure, attempt to depict the cage containing all of its massive teeth.
The front of the chin will stick out to expect like information technology has an underbite. The corner of the oral cavity has lips that droop down to overlap the connectedness to the jaw. Lions have extremely strong biting strength that comes from their jaw muscles, so the dorsum of the jaw is rounded. Complete the head past adding in some round ears.
07. Flesh out the front legs
Draw an overlap of the boney shoulder from the trunk and neck. The form of the upper arm volition swoop from the scapula downwards to the elbow. Make sure to have the arms expect strong and broad. The remainder of the leg will taper down to the wrist and paw, reaching down to some rounded finger tips. They shouldn't expect pointy like a wolves paw since lions are able to retract their claws. Watch for overlaps in the artillery to make them look more iii-dimensional and muscular.
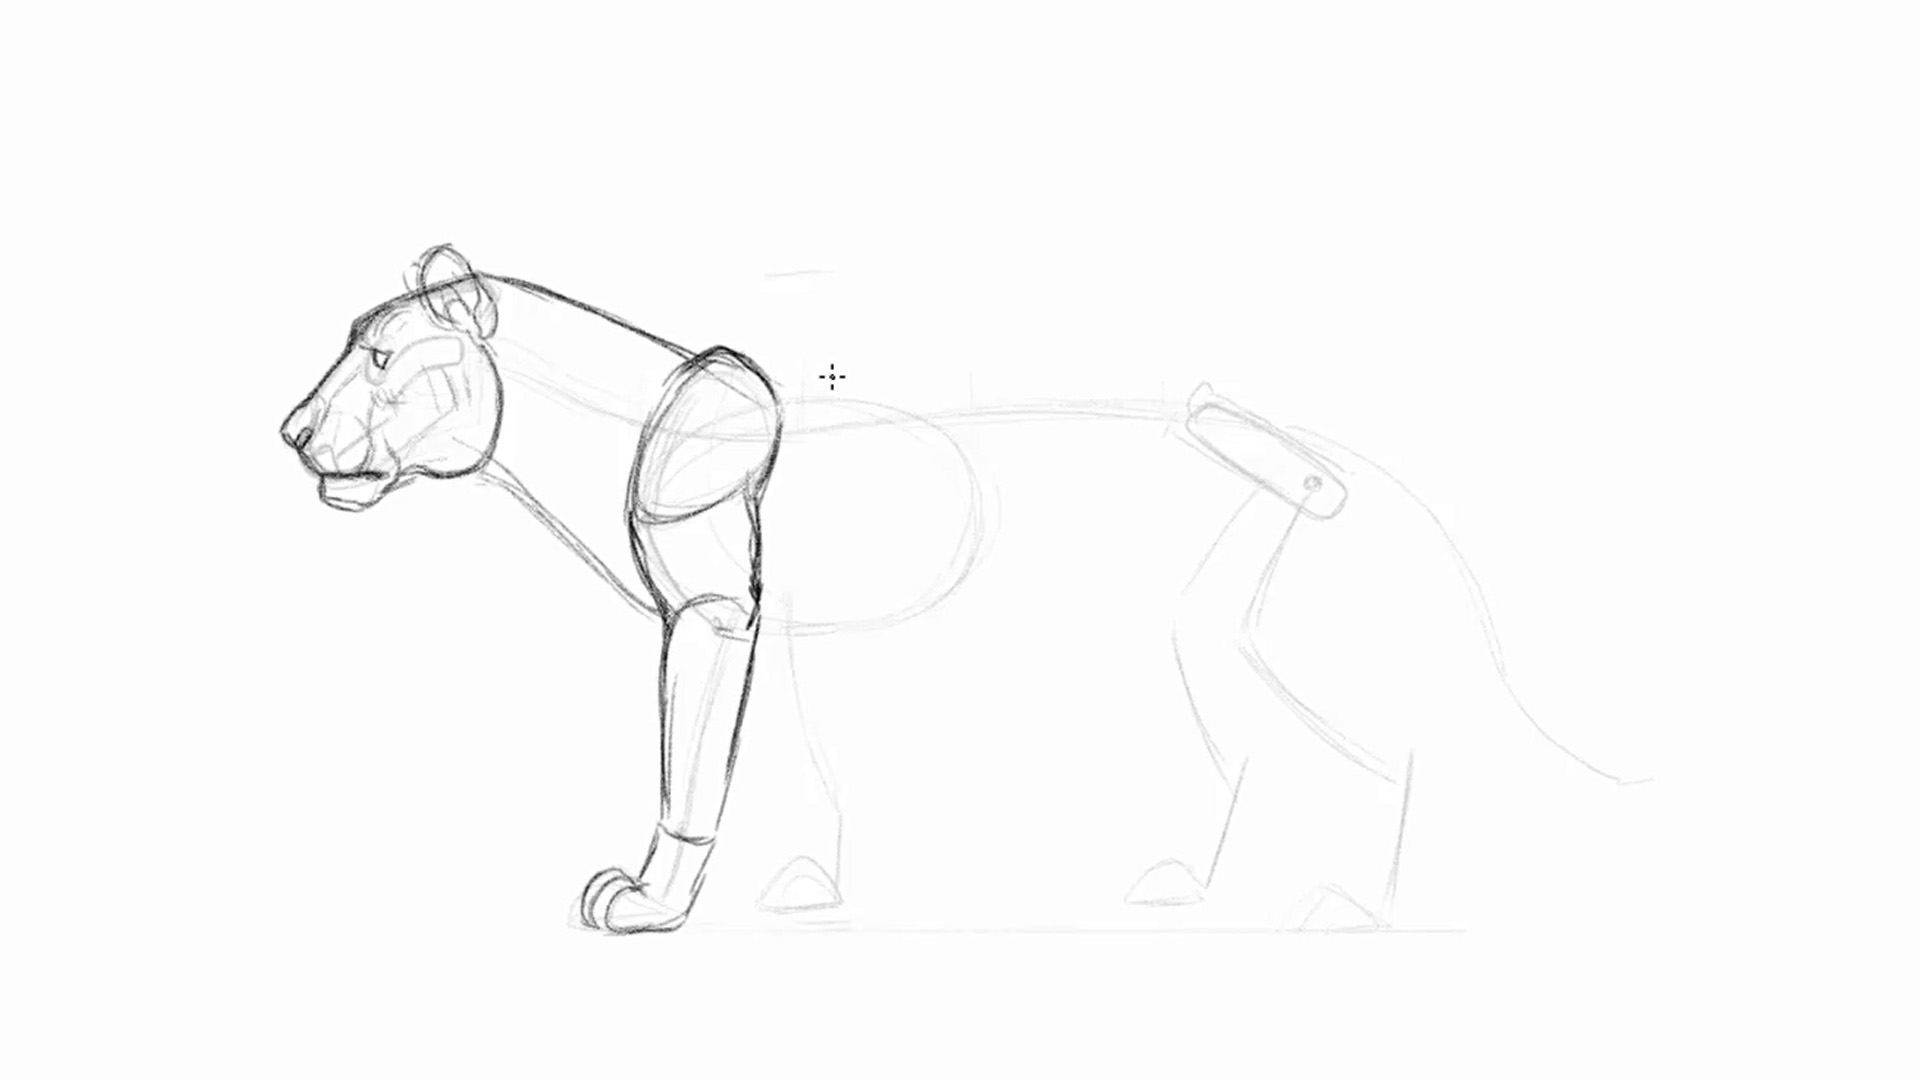
08. Class the hind legs and dorsum
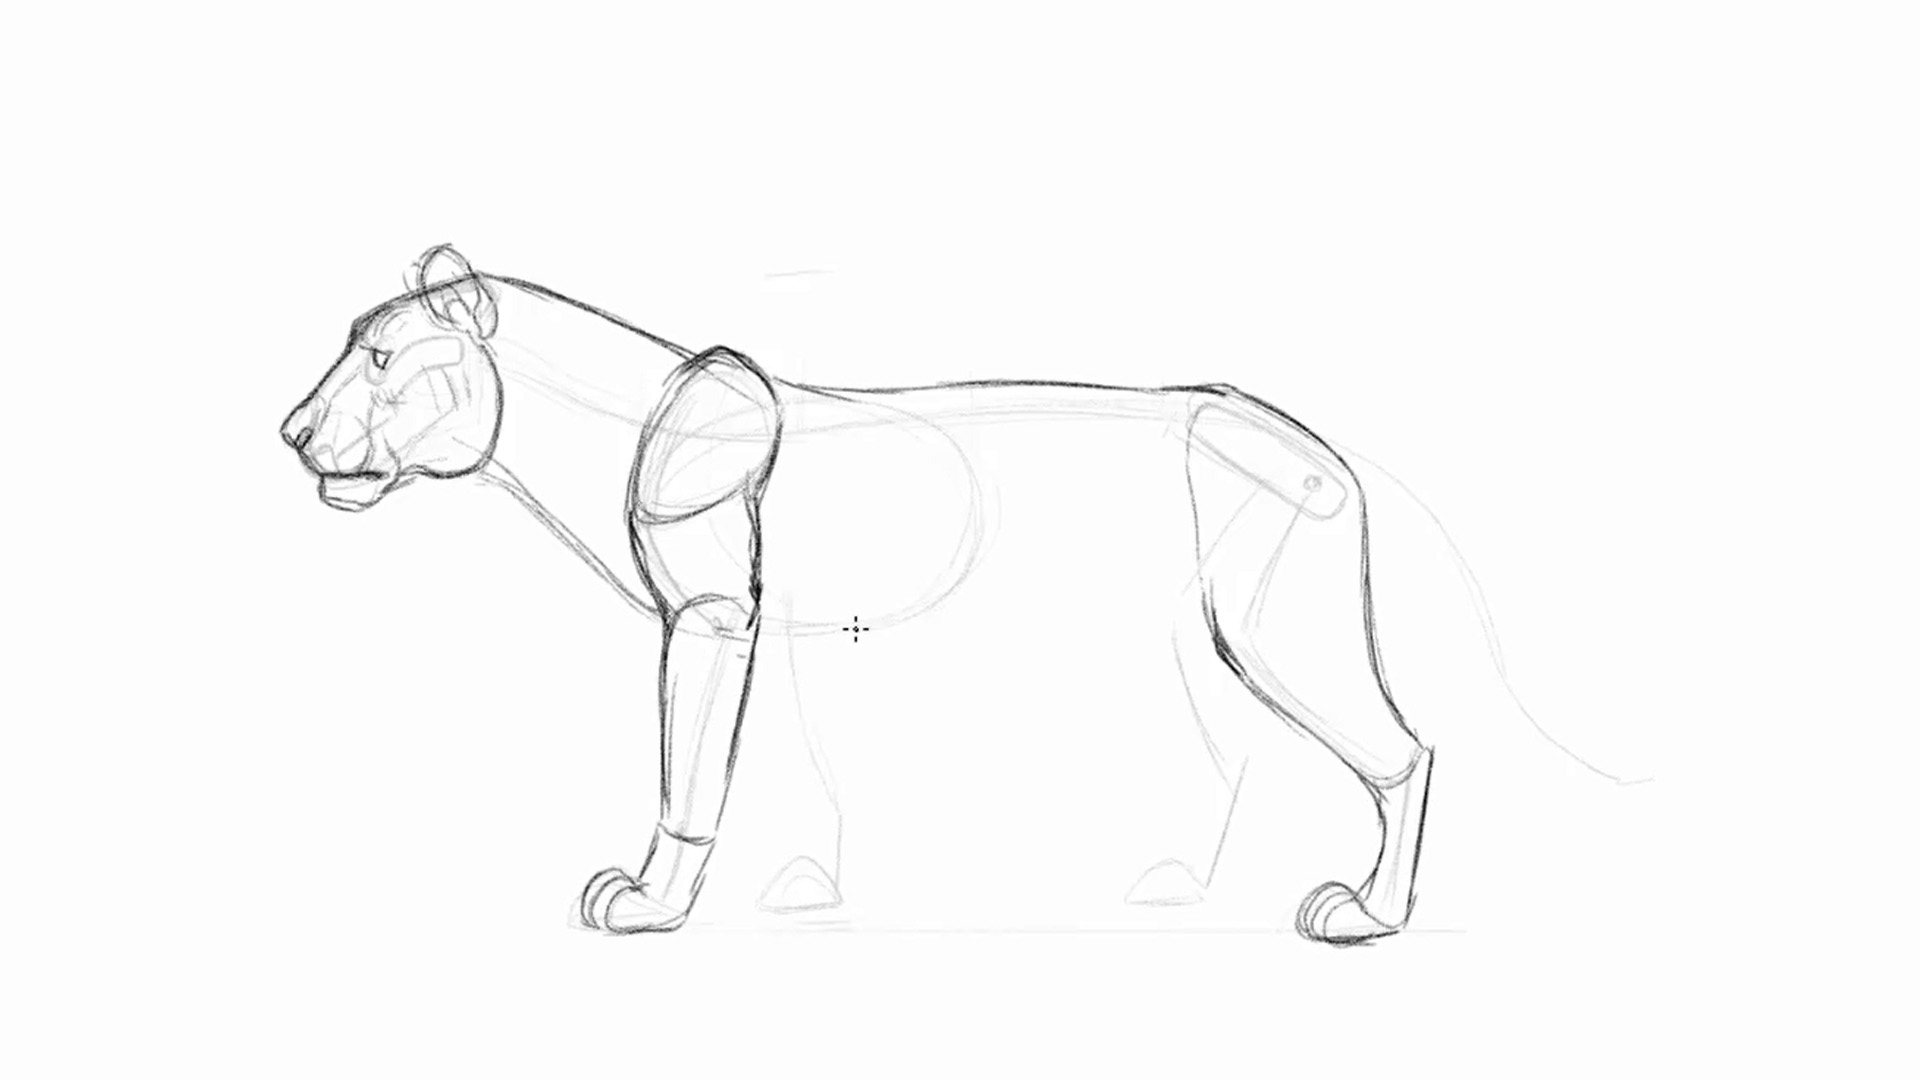
Follow the skeletal construction equally y'all draw the dorsum arch connecting to the hips, flowing directly into the back of the heel bone. The boney heel isn't covered in musculus then it will accept a sharp corner. The acme of the hip bone links right to the knee, and follows the rest of the skeletal structure all the manner downwardly to the toes.
09. Depict in the belly and remaining limbs
To finish off the torso, draw the belly sticking out a fleck equally it tucks upwards towards the back of the hip. And right where the trunk and legs meets, it's continued by a layer of flexible skin . Don't forget to describe in the rest of the limbs in the back.
10. Pattern the mane
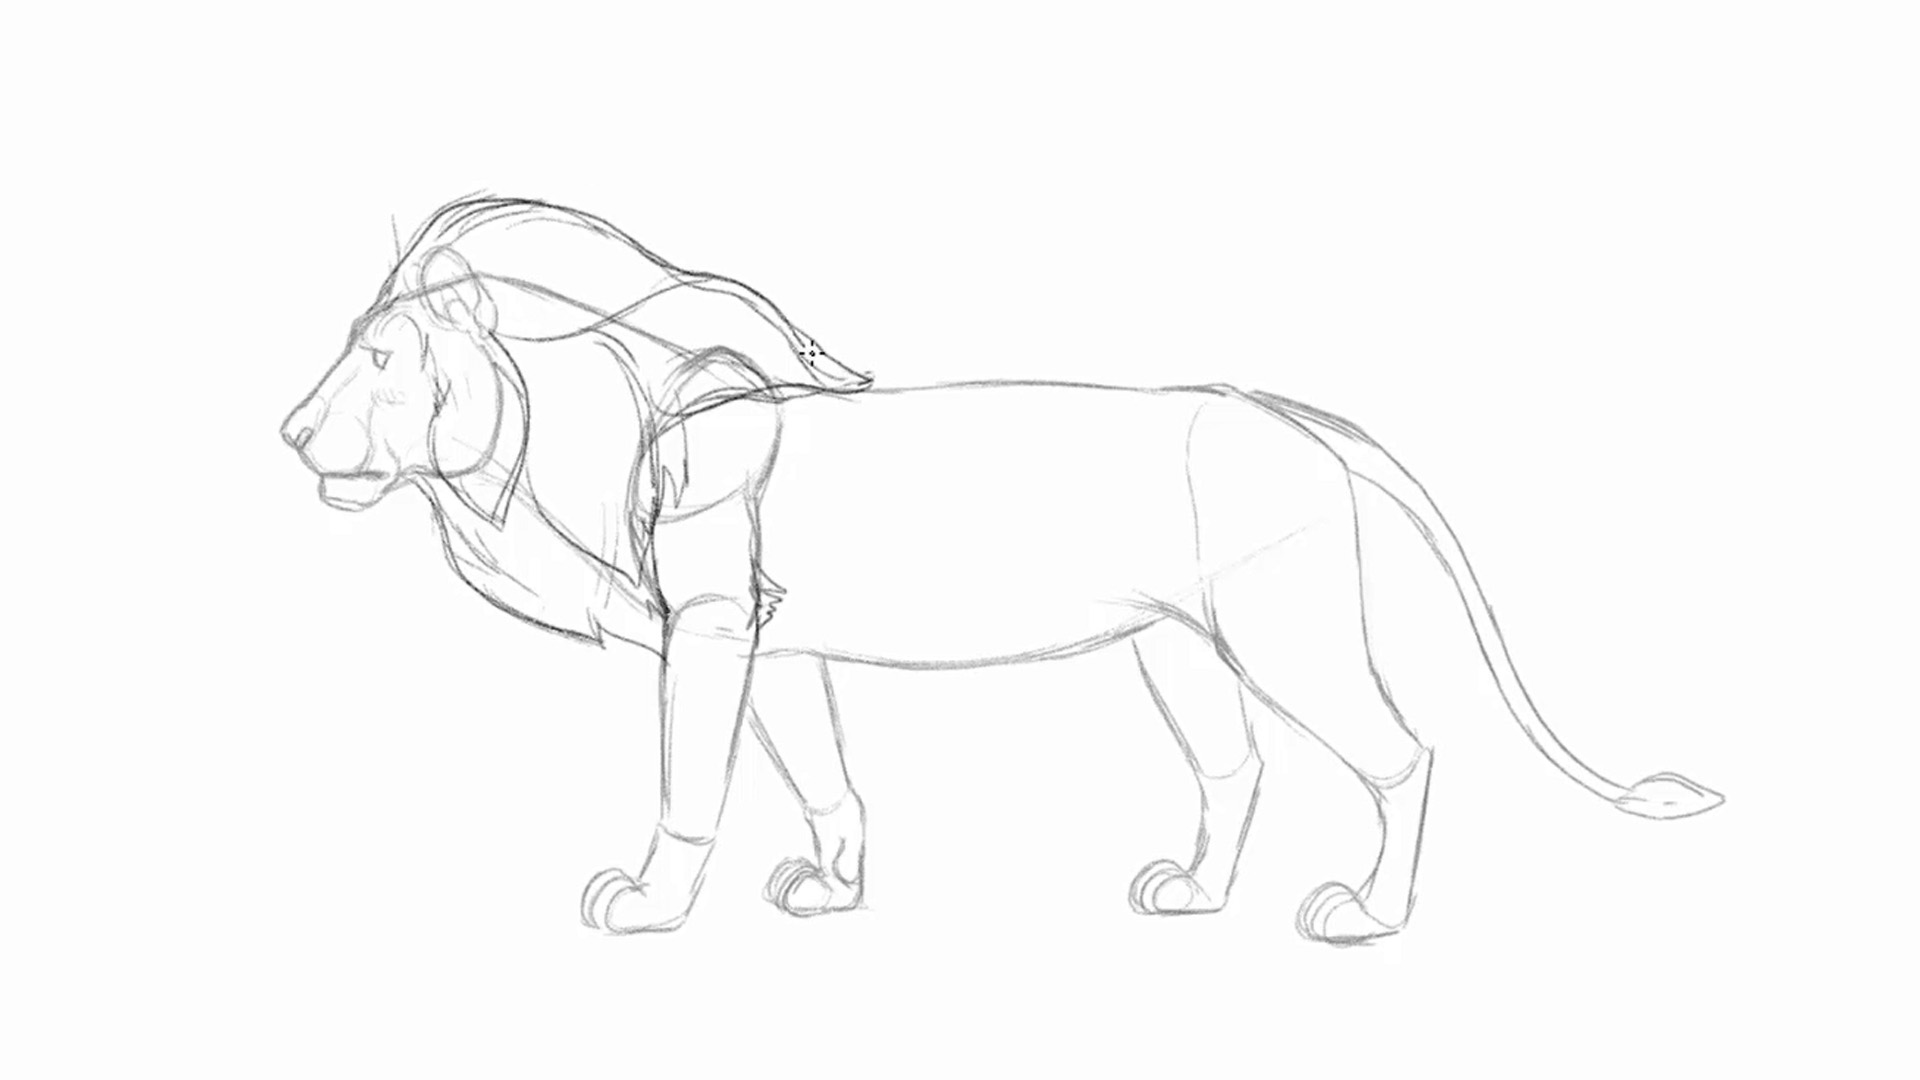
Outline the size and way you lot want the mane to have. Male lions have these big bushy manes that stretch from the head down to the neck, roofing the beginning of the back. This thick hirsuite surface area not only helps the lion protect its neck in a fight, only also identifies their force by making them announced larger, which tin can intimidate competitors. Not every lion has the same mane, and then drawing out different sizes and style is a great mode to bring out personalities in a king of beasts.
eleven. Particular out the face and mane

At present that the mass is formed, let's add some details to the king of beasts. As you draw in the face up, filling in areas with darker bolder lines volition really brand the facial features stick out. Areas like the eye have a dark rim all around, with the inner corner of the eye filled in with black to requite it that strong gaze. The nose and lips also are filled in with darker lines to capture the panthera leo'southward of import features. Follow the guideline to draw in the details of the mane, and add together some pilus to the back of the elbow.
12. Refine the residual of the body
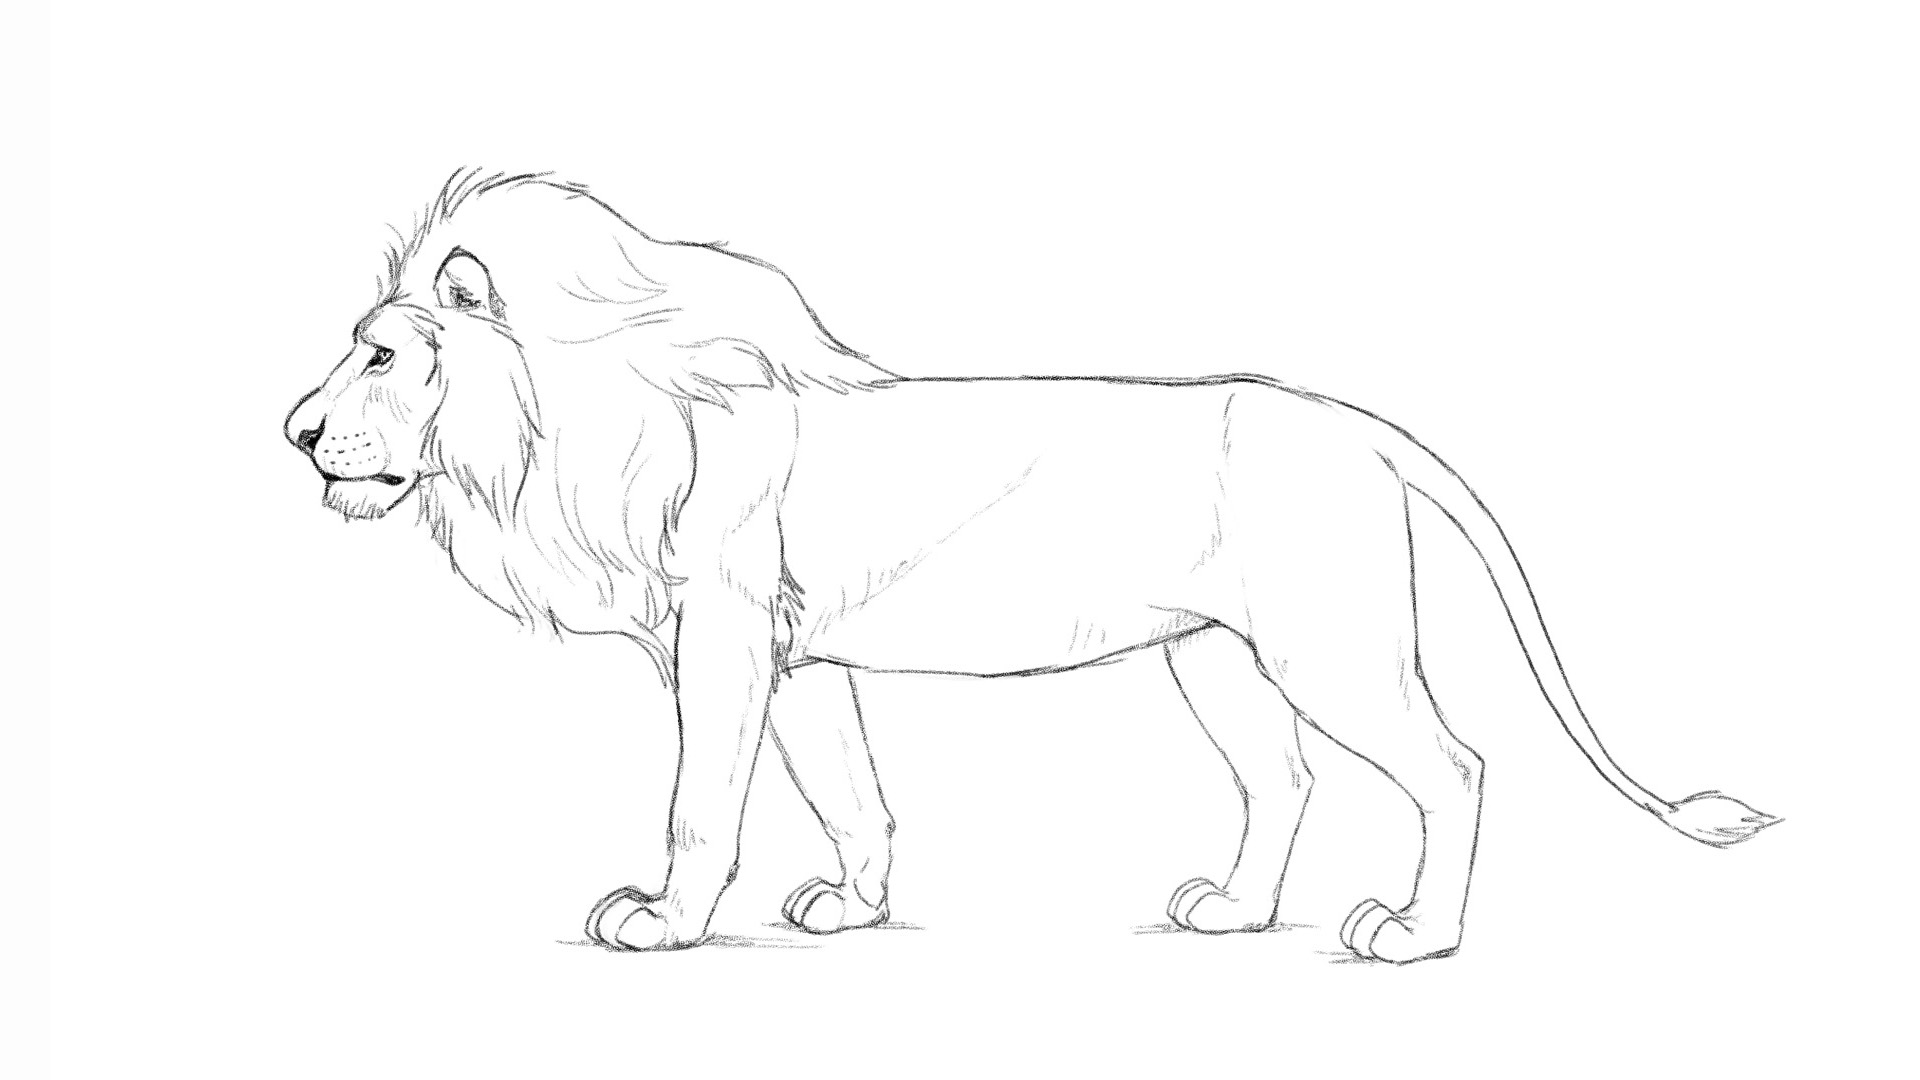
The bulk of the lion's body is covered in very short fur and then there'due south no need to make the lion look hirsuite. Focus on drawing the muscle definition instead. When yous desire to add dimension and form to an area, describe a few hatched lines or describe in low-cal lines forth the grade to imply there is a plane alter. This method volition assistance your drawing wait more dimensional by applying it to areas like the round muscular artillery, the different forms in the face, and the sharp boney areas like the heel and elbow.
xiii. Open up the jaw to make the lion roar

Bringing dorsum the skull nosotros drew in the get-go of this tutorial, open the panthera leo'south jaw. Imagine the jaw hinges where the jaw and cheek meets, and swings back to open its oral cavity.
fourteen. Squash and stretch the areas of the face
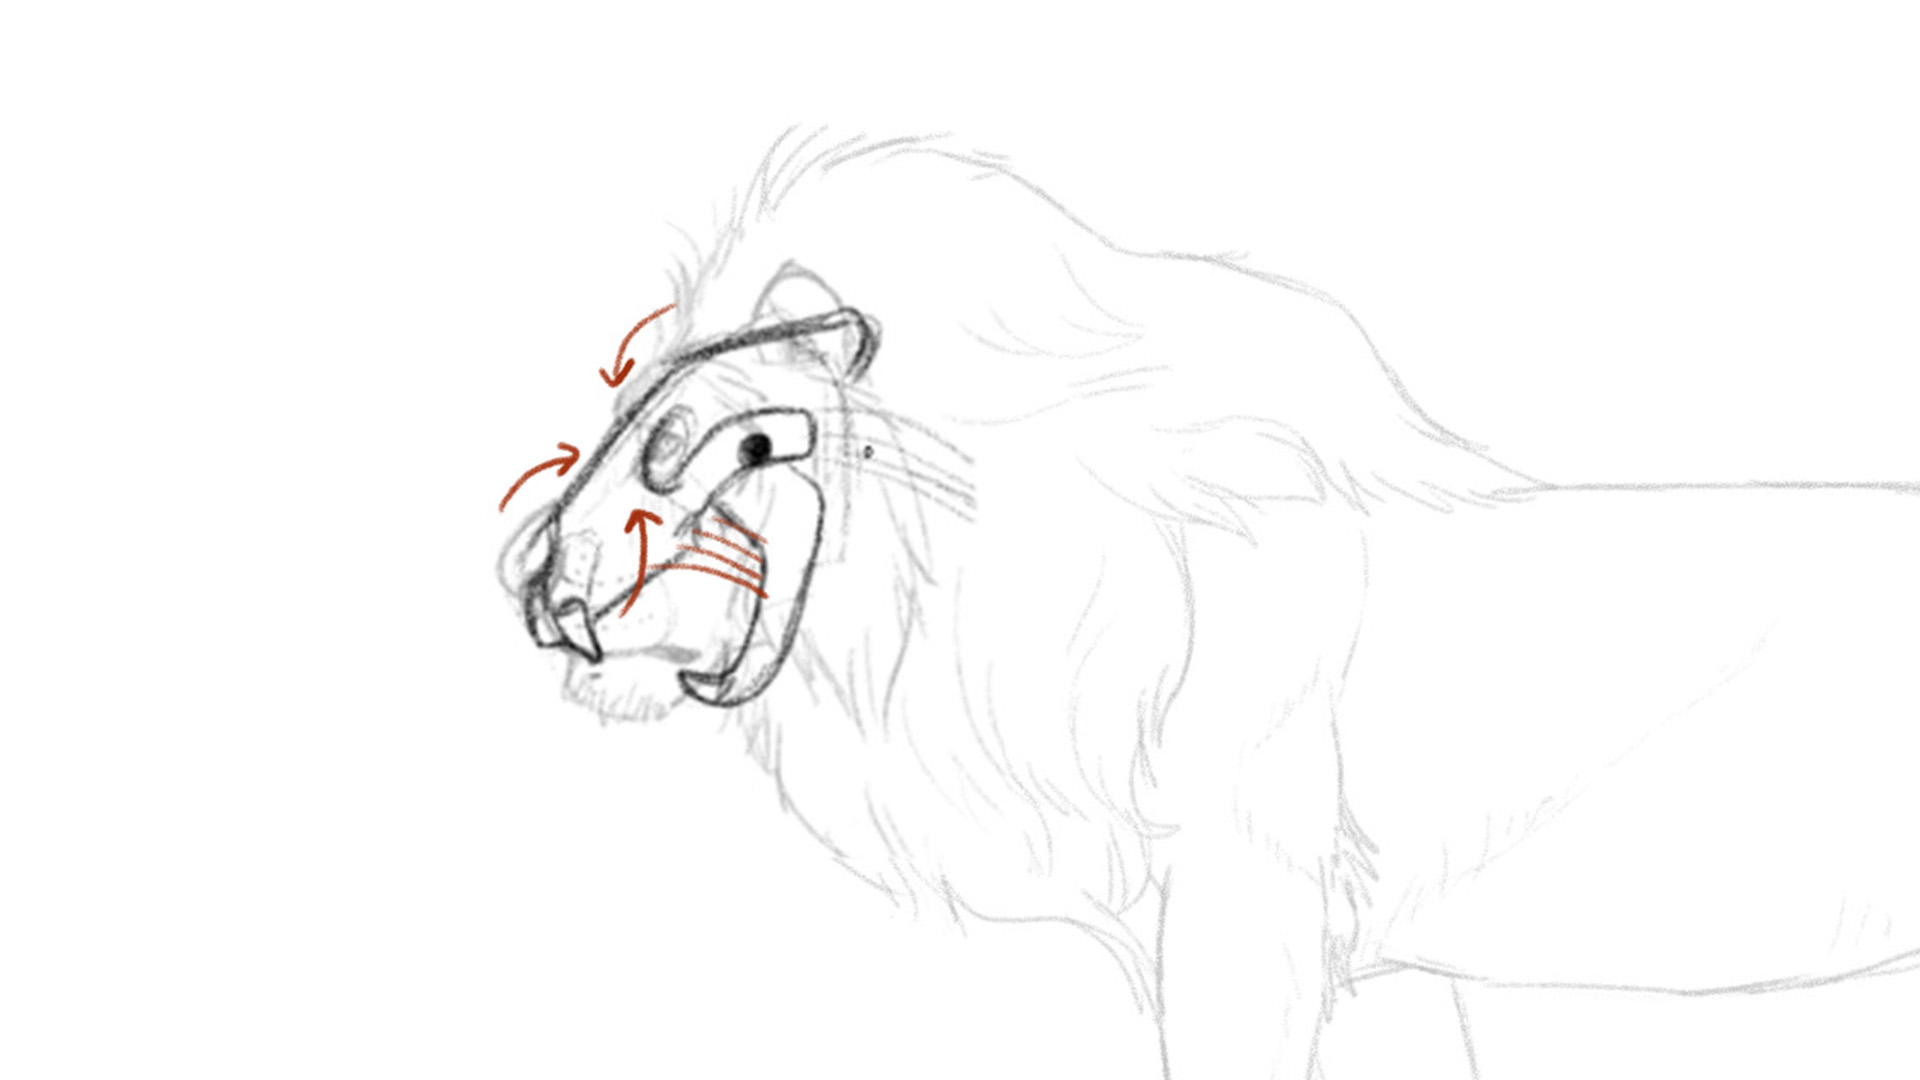
When the lion lets out a big roar and opens its oral fissure, the fleshy areas of the face will stretch and squash. The upper olfactory organ and brows scrunch up towards each other to class wrinkles between the eyes. As the oral fissure opens, the upper lips reveal its teeth, and the droopy lips and cheek stretch out.
15. Connect the head to the trunk
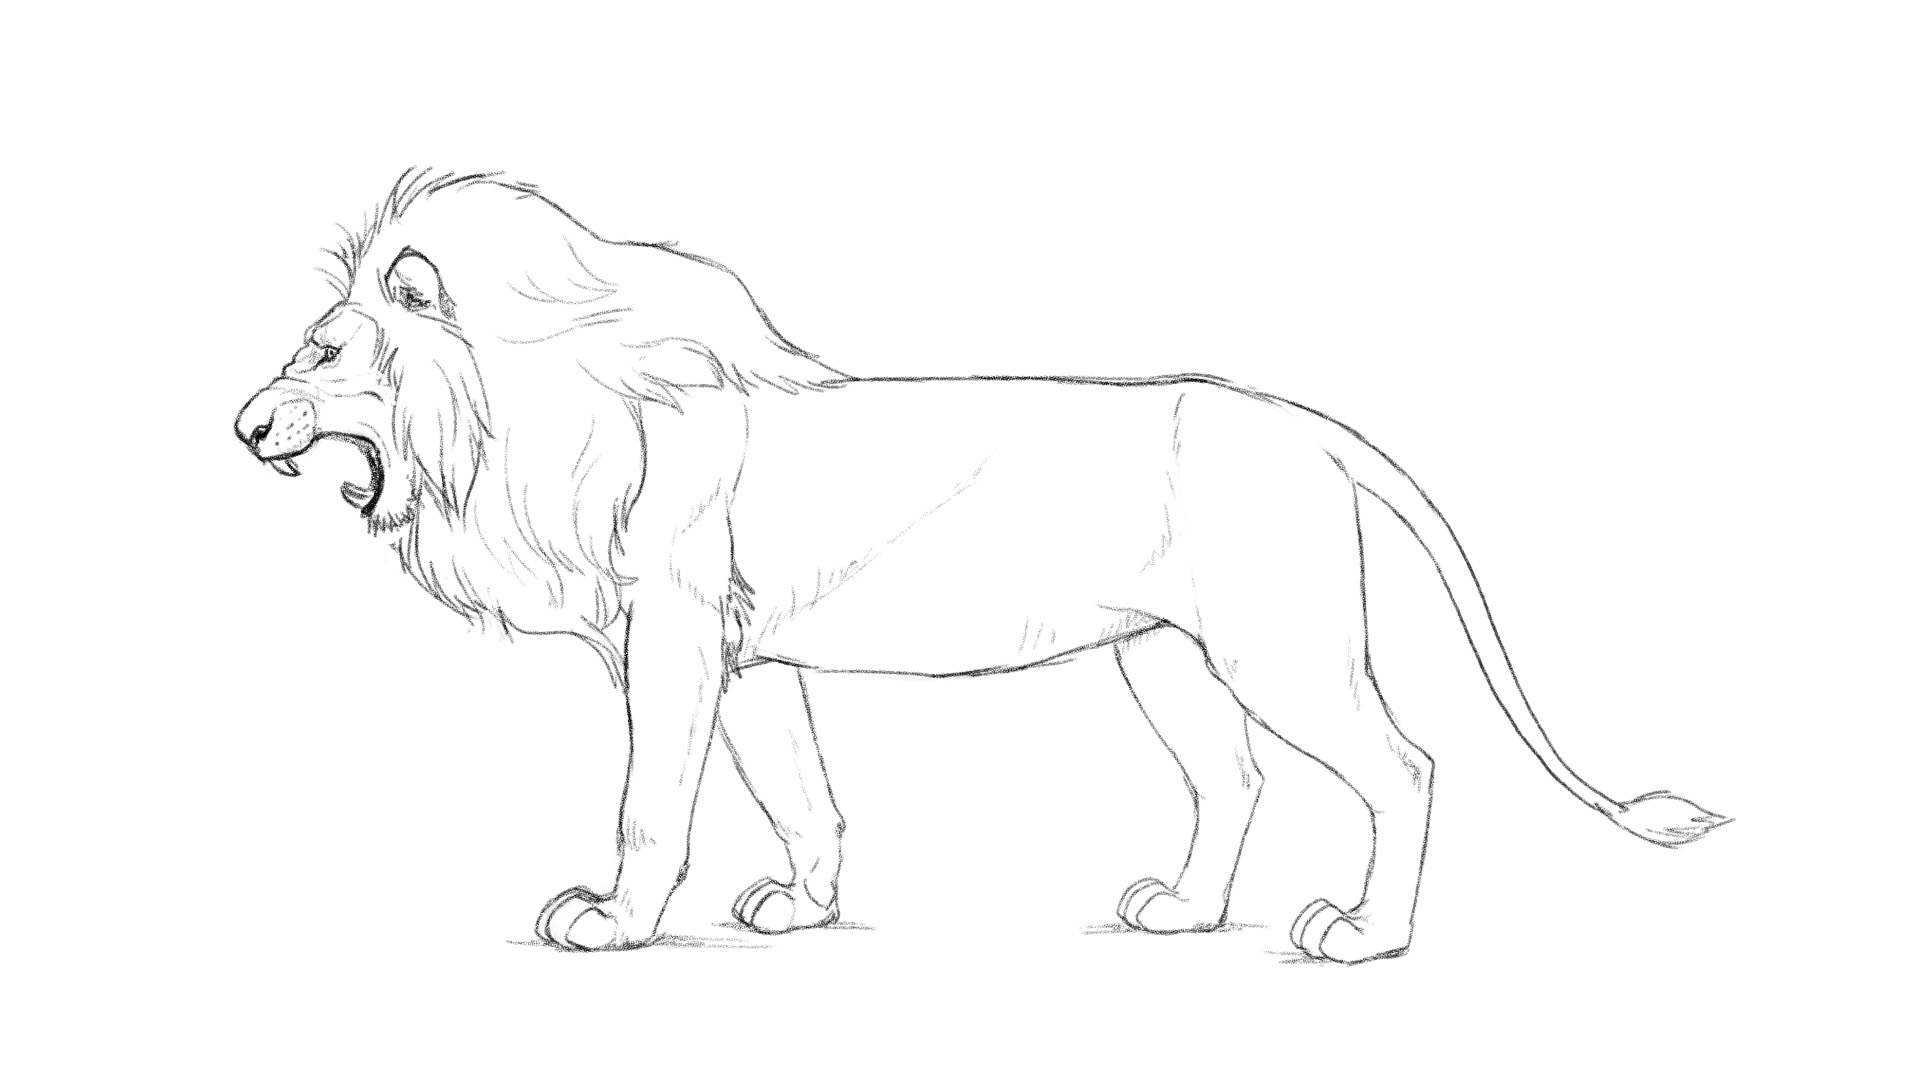
When yous're done drawing in the face, describe in the rest of the mane to connect the face to the body.
Read more than:
- How to draw a bird
- How to draw a domestic dog
- How to draw a cat
Related articles
DOWNLOAD HERE
How to Draw a Lion With Its Mouth Open TUTORIAL
Posted by: michellelailme.blogspot.com


0 comments:
Post a Comment